|
|
DCEmu Reviews is a site which has reviews and more for every console released and so much more. Part of the DCEmu Homebrew & Gaming Network.
Contact us to do reviews Here
THE LATEST NEWS BELOW
|
October 1st, 2010, 20:55 Posted By: bandit

Our contest to win ONE of three XCM XFPS Fire Light Gun for PlayStation 3 is now closed! That's right, there will be THREE winners! All you had to do was post a comment here to be eligible. If you missed out, don't worry. We'll have more contests in the near future.
XFPS Fire Light Gun brings console first person shooters to a whole new experience. Bring the entertainment to your living room! With the XFPS Fire, you can snipe your foes with precision aiming using this light gun. No more having to move your thumbs or getting cramps. Simply point and shoot. What makes the XFPS Fire Light Gun even better is that it works for ALL first person shooters and is compatible with all PS3 systems.
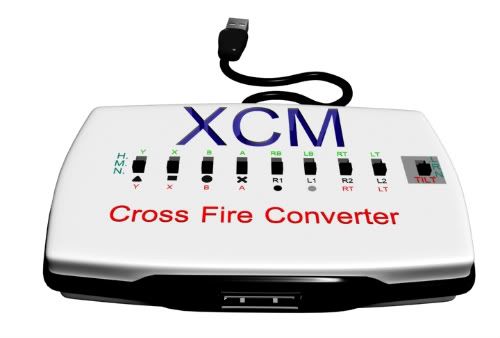
Don't own a PS3? Did you know, even though this is meant for the PlayStation 3, you can still use this on the Xbox 360? All you need is the XCM Cross Fire Converter. Cross Fire Converter is NOT INCLUDED with contest but can be purchased separately at any of these online retailers: Play-Asia, Divineo US, Divineo China, Divineo France, Divineo Spain, ConsoleSource, Extreme-Mods, Gp2xstore, GoldenShop HK or Amazon.com
Be sure to subscribe and follow us on YouTube, Facebook and Twitter for more news and future contests!
And the winners of the contest are... (drum roll)
Da_ALC
Deshevy
beastkidd90
CONGRATULATIONS! Winners will be contacted via PM for your mailing address. This information will be forwarded to XCM who will than ship the prizes to you. Please respond within 48 hours or your prize is forfeited and a new winner will be chosen.
To read more of the post and Download, click here!
 Join In and Discuss Here Join In and Discuss Here
Submit News and Releases Here and Contact Us for Reviews and Advertising Here |
|
 |
|
|
|
October 1st, 2010, 20:21 Posted By: bandit
AVRKey AVR Key USB PSGroove Dongle
Manufacturer: AVRKey (by PS3Key)
Site: Buy from AVRKey Distributors
Price: $49.99
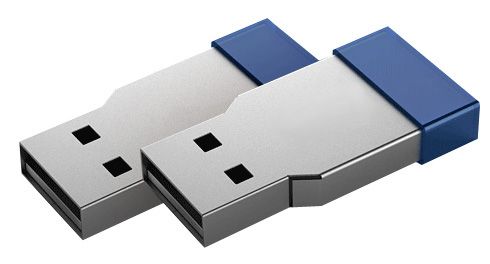
Overview : The AVRKey is PS3Key's open source solution similar to that of Teensy's and AT90USB's. It will not break your warranty seal and is compatible with all PS3 models, both Fat and Slim. Easy-to-use software for backing up, managing, and playing games from external USB Hard Drive. The AVRKey will supports installing homebrew application on PS3 and external USB media. AVRKey supports PSGroove .hex files. THIS DOES NOT WORK ON FIRMWARES 3.42 OR ABOVE UNTIL A NEW EXPLOIT/METHOD IS FOUND!
Requirements :- PS3 Console (fat or slim)
- Console (firmware) version 3.41 only
- Remove all discs from the drive
- Do not connect any devices to the console via USB
- IMPORTANT: The console must be completely switched off before using AVRKey. For fat versions, use the switch at the rear. For slim versions, simply remove the power cable. This is extremely important for the process to work correctly when you start the console.
Features :- USB Plug and Play solution that installs in seconds without any need to open up the PS3.
- Does not break your warranty seal.
- Compatible with all PS3 models*, both Fat and Slim.
- Supports all regions: USA, JAP, PAL and KOREA.
- Fully updatable via USB on your PC using an encrypted bootloader
- 32KB onboard flash (most competing products only have 16KB flash)
- Disables forced software updates and will never brick your console.
- Supports most games and homebrew applications.
- Easy-to-use software for backing up, managing, and playing games from external USB Hard Drive.
- Playing games from HDD is much more enjoyable, benefiting from greatly enhanced seek and loading times.
- Supports installing homebrew application on PS3 and external USB media.
- AVRKey are shipped blank allowing you to install your own .hex files.
* Currently not compatible with 3.42 firmware
Quality/Usability : Also read our PS3Key review.
There has been a lot of confusion between consumers and retailers since retailers are naming it AVR PS3Key or something along those lines. So lets start off by clearing the confusion. AVRKey and PS3Key are made by the same people, both look identical and both use the same hardware but are BOTH different products. The BIG difference between the two is that PS3Key comes shipped with their own proprietary firmware (.upd) file, own software that reads/loads .upd files. AVRKey are shipped blank...as in nothing. With AVRKey, you install your own HEX files (.hex)..the same files as PSGroove.
IMPORTANT : PS3Key comes with YELLOW sticker. AVRKey comes with GREEN sticker. This is how you will know what you received.
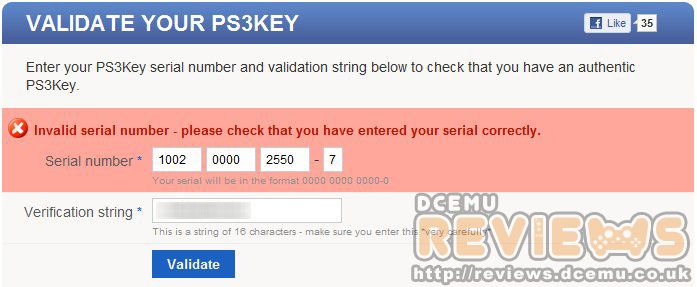
The AVRKey comes in an anti-static bag and on this bag is also a GREEN sticker. This sticker is your serial number and verification string. Unfortunately, there is no URL to enter this to see whether or not it is authentic or whatever the real purpose of it is for at the moment. Entering the serial and verification string at http://www.ps3key.com/en/validate/ will result in an error. This goes to show that AVRKey and PS3Key are two different products.
The AVRKey is housed in a metal casing that looks exactly like PS Jailbreaks and PS3Key. There is also no writing or logo on the housing to prevent any problems with distribution. I personally would have liked AVRKey printed on it as it is a USB development board and is shipped blank. This also distinguishs the difference between AVRKey and PS3Key. The AVRKey measures approximately 1.25" (length) x 0.50" (wide). On the end of the dongle is a blue rubber cap. This protects the board from being exposed and prevent dust and other particles from entering as well as softens the brightness of the LED lights. Like PS3Key, AVRKey dongle is running on ATMEL MEGA32U2 (ATMEGA32U2) and is upgradeable via USB port. When I first received my AVRKey, the USB board was bent. It could not be inserted into a USB port on my computer. So I had to take off the blue rubber cap, pull back on the 2 pins (they are very fragile and can break off if played with too much) and pull the board out. When the soldering was done to the USB and chipset, it was not leveled. I had to bend the USB down so that it was leveled with the board. I was afraid I would break it but didnt. Put it back into the metal housing, slowly closed up the pin and put back the rubber cap.
Instructions on How to Load HEX Files :
Required files:Before you start, download ATMEL's FLIP software via link above (at time of review, AVRKey's GUI program was not available. Review will be updated when available). To get the AVRKey into Update Mode, you must perform the same method as the PS3Key, which is remove and insert the dongle 3-4 times in your computers USB port. When it enters into update mode, the red and blue LEDs will be lit up on the dongle and you will be shown this image:
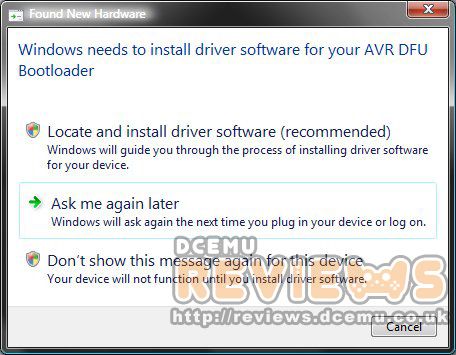
In order for the AVRKey to be recognized, you need to have driver installed. Click on "Locate and install driver software (recommended)"
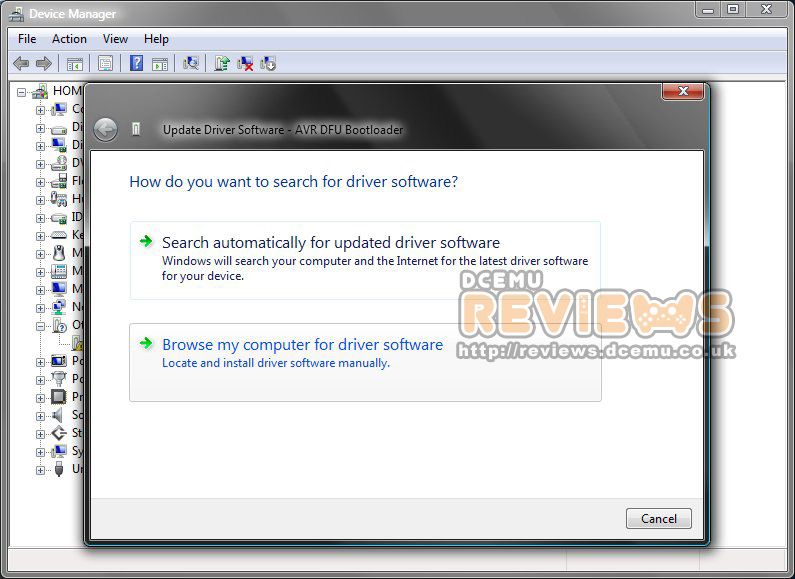
To locate the driver, click on "Browse my computer for driver software"
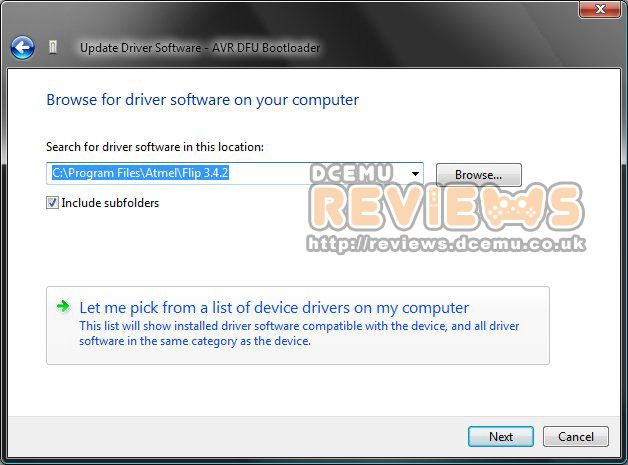
Once you have FLIP downloaded, browse to where FLIP is located on your computer.
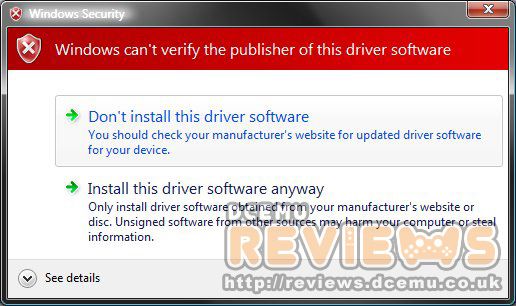
Windows Security may pop up with a warning message saying it can not verify the publisher. Ignore this and click on "Install this driver software anyway"
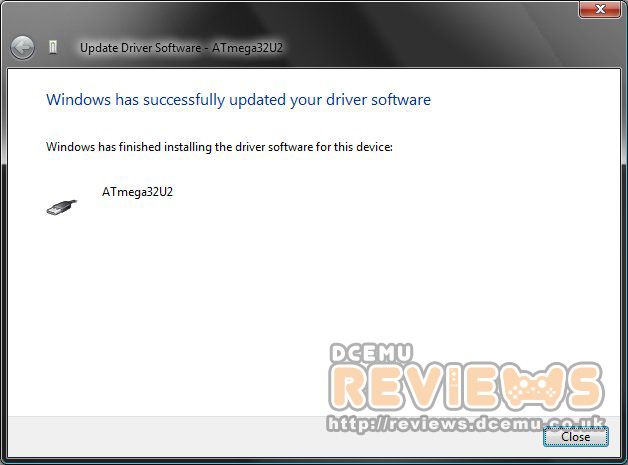
Once completed, you will get this screen
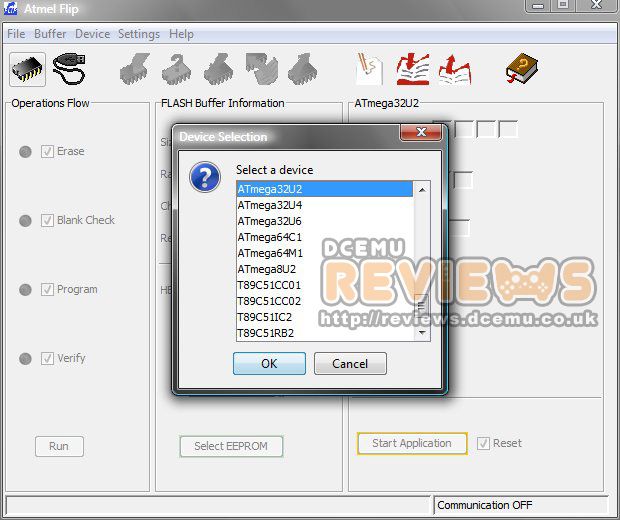
1. Start the FLIP program and click on 'Select a Target Device' (image of PIC chip next to USB cable).
2. A new window will show up showing a bunch of devices
3. Select "ATmega32U2" and click "OK"
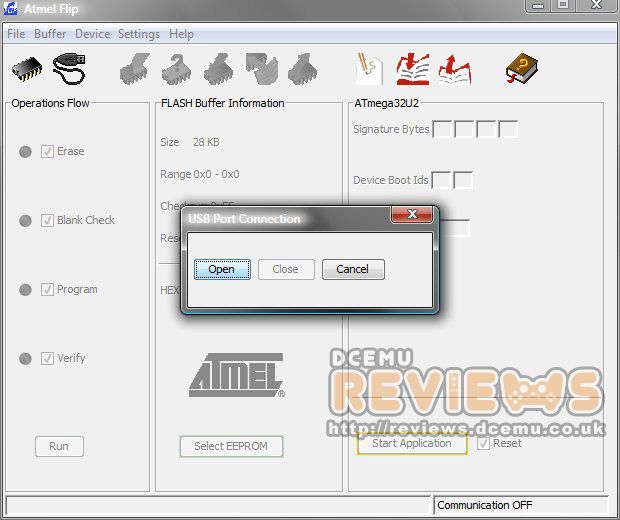
1. Click on 'Select a Communication Medium' (image of USB cable) and a drop down will display
2. Click on USB and a new window will open.
3. Click on "OPEN"
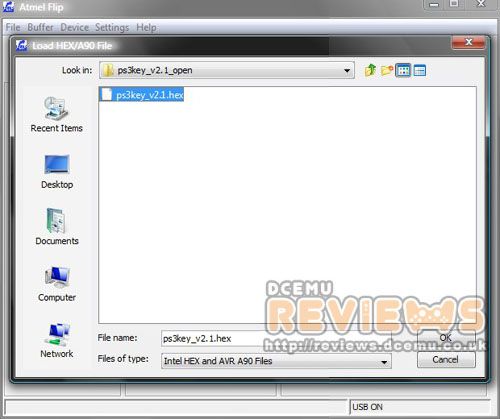
1. Click on FILE and "Load HEX File..."
2. A browser window will open and locate where you saved your HEX file.

Click on RUN and the program will start to load the HEX and update the AVRKey
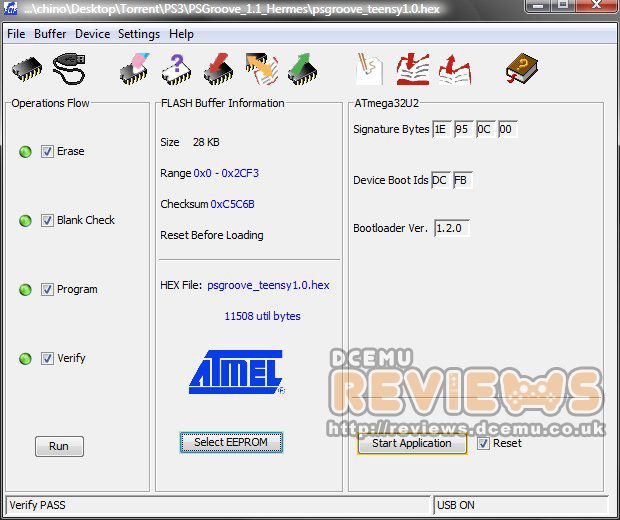
When completed and successful, the bottom status bar will say "Verify PASS". Remove dongle and insert into PS3.
Operation :
Once the power to your console is completely disconnected:- Turn on the console (PS3 Fat with the switch, PS3 Slim connecting the power cable)
- Insert AVRKey into a USB port on the PS3.
- Start up the PS3 and press the EJECT button.
- If the above process worked, there will be a link to “Install Package File” in the game menu.
In order to make sure the AVRKey dongle worked flawlessly, I had to uninstall all my homebrew applications that I had originally installed. To install applications or any homebrew applications, you will need to download and save the .pkg files to a USB drive such as thumbdrive or harddrive. To install, simply insert USB drive to the PS3 and navigate to "INSTALL PACKAGE FILES" on the XMB under GAME. Select the file you want to install by pressing X and it will automatically install the file. All applications installed and loaded without any problems.
There are no other files or programs available to download from www.avrkey.com. Since AVRKey uses PSGroove .hex files, I don't think there will be much released from AVRKey's website. As of 10/1/2010, PS3Key has released an "open" version of the PS3Key firmware as a HEX file which can be used with other generic USB dongle devices and can be downloaded at http://www.ps3key.com/en/members/downloads/.
Conclusion : Overall, the AVRKey AVR Key USB PSGroove Dongle is a great alternative to the Teensy's or AT90USB's...and probably better looking. The dongle is compact and light in weight. What's great is that you can install any HEX file whether it be PSGroove's (Teensy) or PS3Key's "open" version. But is a bit pricey. The AVRKey is priced the same as that of the PS3Key. My only complaint is that there is no logo or indication that its a AVRKey. It looks completely identical to the PS3Key. If you were to remove both from its anti-static bag and mix them up, you wouldn't know which one is which until you inserted it into the PS3 or computer. Depending on the HEX file and how it was compiled, there may not be any LEDs lit up that changes from red to blue to let you know it loaded successfully upon PS3 boot up. If you install PS3Key's "open" version (http://www.ps3key.com/en/members/downloads/), LED will be enabled.
Please note that none of the "upgrade" products listed in this site are endorsed by Nintendo, Sony and/or Microsoft. DCEmu Reviews and DCEmu Network does not condone piracy. The primary functions of a "modchip" and/or "flashcart" are to allow you to play imported games and homebrew software that you legally own or simply just for experimenting with hardware. We in no way endorse piracy, and encourage all users to do the right thing and support the developers/manufacturers that support them. We do not take any responsibilities for any use outside of these parameters or where the use of such a device is illegal.
Images via comments
To read more of the post and Download, click here!
 Join In and Discuss Here Join In and Discuss Here
Submit News and Releases Here and Contact Us for Reviews and Advertising Here |
|
 |
|
|
|
October 1st, 2010, 15:15 Posted By: bandit
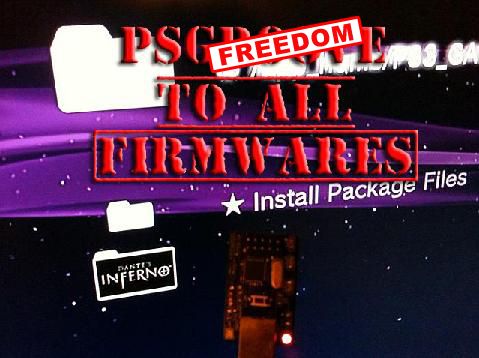
Those who have been holding back and wishing a PSGroove/PSFreedom was ported to that they can still keep OtherOS can stop wishing. KaKaRoto has ported PSFreedom over to 3.01 firmware on the PS3.
Hi,
I’ve got some great news for those of you who have not updated your PS3 firmware! I have just succeeded in adding Firmware 3.01 support into PSFreedom. I’ve pushed the latest code to github and you can now download the source and compile PSFreedom for 3.01.
For now, you will need to edit config.h and change the FIRMWARE_3_41 into FIRMWARE_3_01, then recompile. However, I will soon add support for dynamically choosing the target firmware version by simply doing a :
echo 3.01 > /proc/psfreedom/fw_version
I will soon add support for firmware 3.10 and 3.15, so be patient, and you will be rewarded. I would like to thank Klutsh as well as Philippe Hub who helped me achieve this port to 3.01.
The new payload changes are available in the PL3 github and any project/port that is also using PL3 should automatically gain support for the 3.01 firmware.
You will also be able to enjoy some new ‘tools’ in PL3 that will allow you to dump the LV2 kernel as well as the decrypted ELF files of the XMB and other configuration files it uses. The ethernet dumping is also now compatible with PS3 Slim models.
I would like to thank, again, those who have donated. For the others, you can still donate, if you appreciate the work I’ve done.
Enjoy!
KaKaRoTo
*UPDATE*Update:
Philhug and I have worked together recently to make PL3 compatible with 3.15, and it is now done, working and ready for you to use. I have just pushed the latest changes to github, so just update both PSFreedom and PL3, and define FIRMWARE_3_15 in PSFreedom’s config.h and recompile. You will then be able to enjoy your unrestricted PS3 on 3.15 firmwares. Enjoy!
Source: KaKaRoTo's Blog
To read more of the post and Download, click here!
 Join In and Discuss Here Join In and Discuss Here
Submit News and Releases Here and Contact Us for Reviews and Advertising Here |
|
 |
|
|
|
September 30th, 2010, 15:58 Posted By: bandit
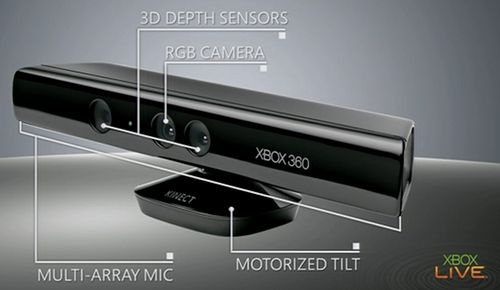
Microsoft has warned that messy floors "with clothes all over the place" will prevent Kinect from working properly. The company also advised against putting the sensor in "a noisy environment", using the examples "on top of your Xbox" and "on top of your subwoofer".
"We rely on the floor for a number of different parts of the technology," said Mark Plagge, Kinect's senior project manager, during a .
"You'll see when the sensor first boots up that it actually does this tilt down, and what it's doing is it's looking for the floor plane. Titles use the floor plane as a point of reference for the skeletons as they're moving throughout the title.
"The floor plane becomes very important, so if you have a very cluttered floor with clothes all over the place and we can't get a good look at the floor - it's a great thing if people can clean that up and move things out of the way."
The Kinect sensor should be placed in the horizontal middle of your telly at either the top or bottom. Exactly where will likely be bossed by the location of your telly's speakers, as having the sensor too close will mean audio interference.
"The other thing is that you want to put as much distance between you and the sensor as possible, so [placing the sensor] higher up actually tends to put an extra foot between you and the sensor," explained Tian Lim, director of Kinect development.
"The ideal play space starts about six feet away from the Kinect sensor. Some games will need you to move side to side quite a lot, so you'll want to know there are three-to-four feet on either side of you."
The requirements don't stop there. People with halogen spotlit rooms may encounter difficulties, as the Kinect sensor prefers an even light source throughout.
"To have really bright lighting in one spot and really dark lighting in another spot: as you move between the two you might actually look a bit different to the sensor, [and it will be] a little bit harder for us to keep track of you throughout the play space," said Kareem Choudhry, principal development manager on Kinect.
Don't panic if you can't remember that, as you'll be walked through each of the elements by on-screen Kinect setup tools.
It starts around 1:25
To read more of the post and Download, click here!
 Join In and Discuss Here Join In and Discuss Here
Submit News and Releases Here and Contact Us for Reviews and Advertising Here |
|
 |
|
|
|
September 28th, 2010, 16:43 Posted By: bandit

Over at PSX-Scene, garyopa, has posted some interesting information about how Sony is really taking this Jailbreak seriously. Lots of information as to who is involved and what Sony is doing. So not only is Sony going after sites that sell (of course), but they are asking the court they need to findout the true identify of everyone that sells, makes, offers for sale, or even has just knowledge of the real people behind any project called PSJailbreak, PSGroove, OpenPSJailbreak, PSFreedom. Sony is going all out!
In an update to the court action against the owners of PSJAILBREAK, I have gotten all the possible recent court documents that are available right now at much personal cost to myself (money for documents), but I thought it would serve the public good to see what the Sony legal dogs are up to.
In these boring legal filings by Sony, it now covers not just PSJailbreak, but also names PSGroove, PSFreedom, OpenPSJailbreak, and they have filed printouts from various blogs, forums, and sites like PS3NEWS with comments and tutorials people have been writing up on how to use these various programs. They even mention of course the phone ports & TI84 calc. hacks.
Sony is using this information, to get the courts to order up faster service, to force the various ISP', Domain Register's, and Web Hosting Services to give up the personal info on their clients so that can serve more court papers on those people, and issue DMCA takedown notices to shut down various sites.
So for the Judge has only granted one order so far, this one is directed to YAHOO! to within 5 business days to turn over all the information they have on a " vladgazoune@yahoo.com", all IP's he used to access his mail, his personal info stored by Yahoo, his email of course, and other logs.
This E-Mail address is the one that was used to rent the mail-drop box in Texas used by http://shoppsjailbreak.com as their virtual office for orders, shipments, registering the domain name, etc.
Recently, that above name site which also goes under the company name of Zoomba stop using the ".com" domain and now is operating under a http://shoppsjailbreak.net domain. -- Plus also the http://psjailbreakcanada.com site which seems to point IP wise to the older site, has suddenly been changed to DOJ/IPR/ICE notice that has been used in the past for "Torrent/Movie" site take-downs!
Anyhow, here is all the public court documents you can read thru them now, and see just what SCEA has been printing out about yourself online, they are asking the court they need to findout the true identify of everyone that sells, makes, offers for sale, or even has just knowledge of the real people behind any project called PSJailbreak, PSGroove, OpenPSJailbreak, PSFreedom.
Don't be surprized if the next few days, you see less sites online, or you find yourself answering the door to a person serving you a Summons to Appear! -- The good reading stuff is the PDF's called Exhibit or Exhibits!
You can view public PDF documents via source link below. What do you think about all this and what effect this has on the homebrew community?
Source: PSX-Scene
To read more of the post and Download, click here!
 Join In and Discuss Here Join In and Discuss Here
Submit News and Releases Here and Contact Us for Reviews and Advertising Here |
|
 |
|
|
|
September 28th, 2010, 04:45 Posted By: bandit
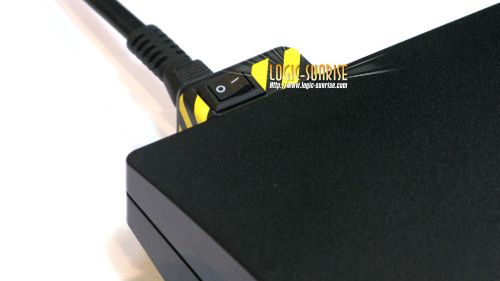
On the original PS3, there was an ON/OFF switch on the back. With the PS3 Slim, Sony removed it. With all the recent outbreak of open source jailbreaks that allows gamers to install homebrew applications, you must start the PS3 from a cold boot. With original PS3, you simply flip the switch but with Slim owners, you must unplug and plug the power cable. This can be a big hassle especially if you're power cable is not easily accessible. This device retails for 19€ ($19.90USD) and is shipping to retailers now.
The TEAM X3 is well decided to offer products of quality to us, and really useful. Thus, for all the owners of PS3 slim which are not equipped with a switch as on the FAT, the TEAM X3 thus developed X3 Switch, a module which connects between the console and the cable of slim in order to create a switch off-set on the top, by avoiding you the tiresome handling of the cable of slim between each starting of a dongle.
Finally the price of the module should be in the neighbourhoods of 19€, costs carriage included/understood. The address of the site as for it is www.x3switch.com and it will be on line under a few hours.
Environmently friendly saving Energy by completely turns off all power that the PS3 Slim would use
Protects your PS3 Slim power connector from wear and tear
Updates the PS3 Slim to have the same ON/OFF feature as the older PS3s (Fat) have by default.
Conveniently locate ON/OFF switch that fits securely to the back of your PS3 Slim.
The X3Switch is a quality designed and manufactured product.
Q1. What are the benefits of using the X3 Switch on my PS3 Slim?
A. X3 Switch completely disables power that currently your PS3 Slim is using while even turned off. With the X3 Switch in the OFF position no power is being consumed by the PS3
Q2. How does the X3 Switch save from wear and tear on my PS3 Slim?
A. X3 Switch will save wear and tear by plugging in directly to the power port in the back of your PS3 Slim. This way you would not have to remove the power cord from your PS3 Slim only from the X3Switch or just turn if off. Then turn it on the next time you want to use your PS3 Slim.
Q3. So the X3 Switch would be just like adding a switch like the PS3 (old Fat) systems have?
A. Yes, that was exactly one of the reasons the X3 Switch was made to replace a feature that was left off of the PS3 Slim.
Q4. How well does the X3 Switch attach to my Ps3 Slim?
A. The X3 Switch was designed to fit tightly, securely and align up evenly with your PS3 Slim.
Source: Logic-Sunrise
Images via comments
To read more of the post and Download, click here!
 Join In and Discuss Here Join In and Discuss Here
Submit News and Releases Here and Contact Us for Reviews and Advertising Here |
|
 |
|
|
|
September 27th, 2010, 16:23 Posted By: bandit
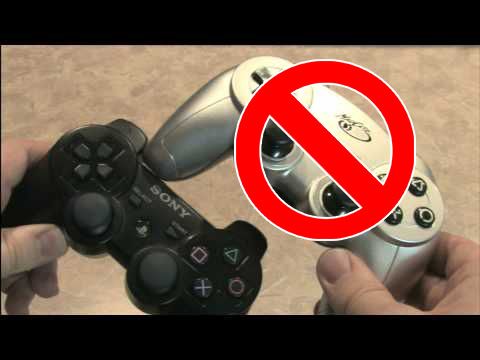
Last week’s PlayStation 3 Firmware update had an impact on a limited number of peripherals that made them stop working. Sony of course issued a statement that it did not support unlicensed or pirate hardware. Well, apparently there were reports that some MadCatz PS3 add ons were also effected. Today, MadCatz issued a formal response and approach to the situation:
Over the last 24 hours, various media outlets have reported on issues gamers are experiencing after downloading and installing the new ‘3.50’ Firmware for their PlayStation 3 video game systems.
Mad Catz would like to take this opportunity to put gamers’ minds at ease. With the exception of a small quantity of controllers sold before 2008, we believe that all Mad Catz products will continue to function as they did prior to the 3.50 Firmware update including high profile products such as our range of Street Fighter IV™ FightSticks and Wireless FightPads; our range of controllers and accessories for Call of Duty®; our Cyborg F.L.Y. 9 Wireless FlightStick; our wired and wireless control pads; and our range of Rock Band™ accessories.
Any consumer who owns a Mad Catz product and is experiencing an issue, including an issue with the PlayStation 3 Firmware update should contact Mad Catz customer services. Providing the product is within warranty, Mad Catz will be happy to offer a suitable replacement.
Technical Contact information for MadCatz:
Technical Support – USA
Tech Phone: 1-619-683-2815
Toll Free (USA): 1-800-659-2287
Email: techsupport@madcatz.com
Support Hours:
Monday – Friday: 8am – 12p & 1pm - 4pm (PST)
Closed Saturday, Sunday and most major US holidays
Technical Support – UK
Tech Phone: +44 (0) 1633 883 110
UK only: 08450 508418
E-Mail: uksupport@madcatz.com
Technischer Support – Deutsch
Per E-mail: dehotline@madcatz.com
Telefonisch: 089-54612710
Mo – Fr von 16:00 – 19:00 Uhr
Source: FileFront
To read more of the post and Download, click here!
 Join In and Discuss Here Join In and Discuss Here
Submit News and Releases Here and Contact Us for Reviews and Advertising Here |
|
 |
|
|
|
September 26th, 2010, 17:02 Posted By: bandit
ENTER NOW TO WIN!! LESS THAN 1 WEEK LEFT!!

Since today starts the beginning of a new month, why not start it off with another contest!? We have teamed up with XCM again to give you a chance to win one of THREE XCM XFPS Fire Light Gun for the PlayStation 3! XFPS Fire Light Gun brings console first person shooters to a whole new experience. Bring the entertainment to your living room! With the XFPS Fire, you can snipe your foes with precision aiming using this light gun. No more having to move your thumbs or getting cramps. Simply point and shoot. What makes the XFPS Fire Light Gun even better is that it works for ALL first person shooters and is compatible with all PS3 systems.
To enter, all you have to do is comment on this post. In order to posts comments, you must register first, if you aren't registered already. This contest is open to all gamers WORLDWIDE! Winners will be selected on October 1st. We will contact winners for mailing address and all items will be shipped by XCM.
Thanks to everyone who enters and good luck. Remember to post a comment in order to be entered into the contest. Again, a big THANK YOU to XCM for providing the goods.
Don't own a PS3? Did you know, even though this is meant for the PlayStation 3, you can still use this on the Xbox 360? All you need is the XCM Cross Fire Converter. Cross Fire Converter is NOT INCLUDED with contest but can be purchased separately at any of these online retailers: Play-Asia, Divineo US, Divineo China, Divineo France, Divineo Spain, ConsoleSource, Extreme-Mods, Gp2xstore, GoldenShop HK or Amazon.com

Be sure to subscribe and follow us on YouTube, Facebook and Twitter for more news and future contests!
DCEmu Reviews and DCEmu is not responsible for lost or damaged packages, damaged PS3s and/or electronic devices. All shipping of prizes are handled by XCM. Any concerns in regards to XCM XFPS Fire Light Gun or shipping, please contact XCM at xcmcc@xcm.cc.
YOU MUST POST COMMENTS AT http://reviews.dcemu.co.uk/comment-n...-3-323713.html
To read more of the post and Download, click here!
 Join In and Discuss Here Join In and Discuss Here
Submit News and Releases Here and Contact Us for Reviews and Advertising Here |
|
 |
|
|
|
September 26th, 2010, 15:29 Posted By: bandit


Yesterday, we posted the news on the Proof of Concept PSGroove ported to PlayStation 3 Sixaxis. Today, hasuky, from ElOtroLado who made the video (seen below), has posted the guide on how to modify your PS3 Sixaxis controller. Some soldering skills will be required. Also, it doesnt seem to be an actual port of the PSGroove. Its seems to be more of installing a PIC inside the PS3 controller and wiring it to the USB port. For the amount of work put into it, I personally prefer to just purchase a USB development kit. Hopefully, he can provide clearer pictures for us to see. Until than, enjoy.
Translated via Google:This Mod is based on a pic 18F2550 PsgrooPic with Sixaxis PS3 controller adapted to take into account that will comply with 2 main functions:
Ps3 launch debug mode without losing any original settings and also be updatable.
Clarified, as any MOD is to make use of solder on the board of control, nothing complicated, only 8 of them.
Materials:- 1 Control Sixaxis PS3 (in my case I have one of a Pack of 80g without vibrator, will also be worth for DUALSHOCK 3 but I have not tried).
- 1 Pic 18f2550 and to have a list to create a Picgroove in components as much as the programmer. In EOL there are many TUTORIALS on the matter, I personally I used the scheme of th0rin, in its version 1.2, that is to say, PSGroo 1.2.pdf can see tambiem it in this connection: hilo_tutorial-psgroopic-programador-casero-esquema-elsemi_1484968_s580 in an appointment of our companion calvo225, follows all the passages until having pic programmed. I recommend the Art2003 programmer with the WinPic800 program EYE: Pin 26 must go to mass if option LVP in the Config eyelash of the WinPIC800 were selected. If option LVP were not used, it is not necessary.
- Cable to do puestes (uses cable of data for them hard disk IDE of 80 very pratico wire and a single hair.
- Soldering iron, tin, scissors, graze FLUX, etc
Construction:
We already take pic previously programmed with the PSGrooPIC_wBTL_HEX_V1.5.hex file we doubled all the legs to him to be able to perfectly place it in a place of the control:
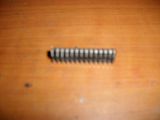
[Click on image to enlarge]
This it is the best place than I obtained pic enters perfect, to put it with the legs seeing towards outside
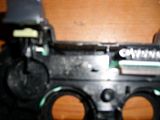
[Click on image to enlarge]
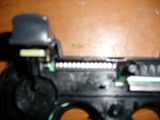
[Click on image to enlarge]
Seeing where it goes ours we removed pic, we cut it pieces of cable IDE but of 5 cm. and already do not come to weld the points: 1,8,9,10,13,14,15,16,19,20,25,26 one by each point. To remember that pic is seeing towards outside, points 15.16.19.20, 25 and 26 they are below pic and habria that to double them upwards, nothing complicated for the other points is but easy since they are in the part superior.
Now it is necessary to weld all the necessary components for the Pic:
2 10 Resistance of k.
1 Resistance 330 ohm.
1 470 Condenser of 220 or nf.
2 22 Condensers of pf.
1 Crystal of 8, 12, or 20 mhz.
1 Condenser 100 nf.
1 LED (any color, I have not placed it).
Puden to follow this scheme for easy interpretation
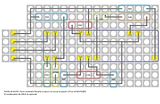
[Click on image to enlarge]
Utilizen cable pieces IDE to be able to connect them to pic, the subject of the Jumper and exits VCC, D+, D and GRN leave to cable sufficient about 10 cm more or less to have chest of drawers the installation if there is to cut cut. The LED that leaves not places it since I do not believe that it is necessary, now if they alquien wants to place it well, In this photo I show more or less as it must be before welding something, also can look for another form to place them for my was the best one than encontre:
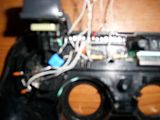
[Click on image to enlarge]
CLARIFYING:
Before welding something to the order they deberan to try that pic works I correctly I connect to him to exits VCC, D+, D and GRN a connector usb and probe if took exploit, if everything goes well we come to the step to weld to the control, the points marked with colors are those that so go soldiers to the plate what without altering nothing.

[Click on image to enlarge]
One sees that in diagram it leaves as everything connected goes are simple welds, in the part of the JUMPER is necessary to remove the two lines and to place them in the button stick straight (THIS IS TO UPDATE the PIC FOR FUTURE UPDATES OF the PSGROOVE).
In the right part superior notese that is one extencion of button RESET have extended I it and added switche that goes adapted to the housing of the order I had to use a Dremel to be able to place it and to leave it outer (this it is but the important one of all so that when driving it annuls it to any funcionabilidad usb of the offer giving entered the Exploit). I recommend beings to cover everything to place insulators between cables, pic and the mini connector usb to guarantee the good operation.
Operation- In order to be able to take the Xploit usb in the console and the control only places the cable, to have previously extinguished and ignited the console in the back button, soon to have tight button RESET and next to push button POWER next button EJET to activate way DEBUG, to hope until it leaves the logo the console, you can retire the control and push button PS (is the one of means of the control with the PS abbreviations, to look for games and sides the two folders that indicate that everything to come out well.
- In order to update the PIC it must have these programs installed in the PC:
- vcredist_x86.exe
- dotNetFx40_Full_setup.exe
After to install them you run the program:
3. HIDbootloader.exe
that he is the one in charge to program pic, usb in the control places the cable acontinuacion to have tight simultaneously in button RESET and the button of the left Stick (the button reset is for annulling to any activity usb in the control and stick analogical left abre step to activate the way to bootloader of pic) already to have fulfilled that coarse one to install the other end of the cable usb to the PC. Automatically the program would detect the device at issue. This same one becomes at the beginning of tuto before installing it in the control to program in .hex of exploit, in the interface of the program is very easy to interpret.
Note: to only do this when we have a new update for the Pic, we must take into account that already it has completes installed it updated and can play without inside having no disc (in some cases there are games deserves that it).
Good up to here everything by the moments, I hope that for something it serves east project since for my to be very encouraging it to have realised in spite of the bad criticisms that I have had thanks to all what they supported to me and to the equipment of Eol.
Greetings
Source: ElOtroLado Forums

Images via comments
To read more of the post and Download, click here!
 Join In and Discuss Here Join In and Discuss Here
Submit News and Releases Here and Contact Us for Reviews and Advertising Here |
|
 |
|
|
|
September 25th, 2010, 19:56 Posted By: bandit
 (Sony May be Unhappy if this news goes mainstream) (Sony May be Unhappy if this news goes mainstream)
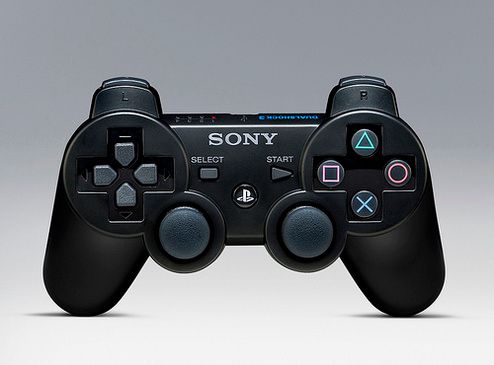
There were reports of people trying to use the SixAxis controller to Jailbreak the PS3. However, we stopped hearing about any progress on it and heard more about clones such as the PS3Key and P3Free and many others. Now, there seems to be proof of a PSGroove port on a PlayStation 3 SixAxis/DualShock 3 controller! Forum user hasuky from http://www.elotrolado.net/ stated that he'll be putting more info online tomorrow.
Translated via Google:Starting by telling you, not to say bad words for those many people that maybe criticize the work of others without having done any research or evidence. I feel sorry for these people and for those who doubted in this project: I've spent a bit of my time and achieved what I wanted to do, not having a separate usb device, I wanted to run from the command Psgroove Sixsaxis and step be updatable via PC with just the controller and a USB cable for your bad luck has made the video I'm uploading it now takes a bit because my connection is shared. If you wait about 30 minutes more or less what you see, long time I was interested by the different consoles, as amended. I tell you to cool something that was the first to repair a bad nand extracted from a xbox 360, I have a couple of tutorials that many served him. And thanks to EOL and many people who make this forum what is now really. Tomorrow I will have to make the tutorial and make the respective tests.
It seems that not only do you use the controller to jailbreak your PS3 but you can continue to use it like a normal controller. However, you would need to connect the controller via USB cable first. This is like a shot to Sony's heart considering modders are using Sony's own product to jailbreak their system.
*UPDATE*
It seems that it will require some soldering in order for the PSGroove to be flashed onto the PS3 Controller...
*UPDATE #2* (9/26/10)
So after looking and reading a rough Google translation of the guide (which can be found HERE), it doesnt seem like its an actual port of the PSGroove onto the PS3 controller. Its more of installing a PIC inside the PS3 controller and wiring it to the USB port.
Source: ElOtroLado Forums / ElOtroLado Forums (Update #1)

To read more of the post and Download, click here!
 Join In and Discuss Here Join In and Discuss Here
Submit News and Releases Here and Contact Us for Reviews and Advertising Here |
|
 |
|
|
« prev
17
18
19
20
21
22
23
24
25
26
27
28
29
30
31
32
33
34
35
36
37
next »

|
|
|


